


Be Heard Clearly with a Good Mic
Before I settled on the Yeti, I tried other solutions. For example, my set of smartphone earbuds with its built-in microphone was an improvement, but after 20 minutes, the earbuds felt uncomfortable in my ears, and it was painful to wear them. Plus, the wire was annoying. I found myself constantly moving it out of the way when I reached for my keyboard, mouse, phone or other objects.
Frustrated, I opened my media closet and saw my Blue Yeti USB Microphone. The idea had not previously occurred to me to try it for videoconferencing because, up to that point, I had only brought it out when someone needed to record a voice-over for a video. I plugged one end of a USB cable into the Yeti and the other end into my computer, selected “Yeti” in the software settings and started a Zoom meeting with one of my classes. I polled my students early on in the class to see if they could tell the difference between various sound sources I had been using that week. They unanimously preferred the audio quality of my Yeti to every other device I had tested. Now, whenever I teach online, I use the Yeti.
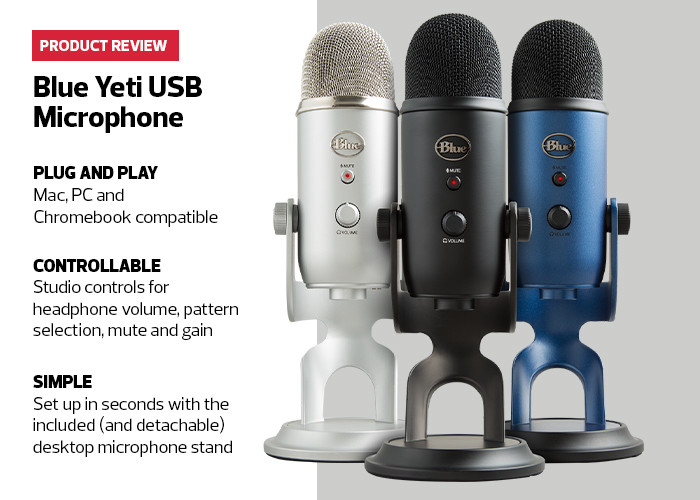
Weighing in at approximately 3.5 pounds and standing about a foot in height, the Yeti is a sturdy powerhouse that can easily withstand a few bumps. As for its design, the microphone itself can pivot on its base, so once users find their ideal angle in proximity to their sound source, they can easily hand-tighten two knobs located on either side of the stand to secure it. The Yeti can also be removed completely from its base for mounting directly on a mic stand.
LEARN MORE: Whittle down the best options with a structured choice approach to edtech.
Adjust and Control Sound as Needed
On the front of the microphone is a mute button, conveniently positioned so that if I feel a cough coming on, I can just press it. Located just below the mute button is the headphone volume dial, which can be easily adjusted. On the bottom of the Yeti, there is a 3.5-milimeter headphone jack that allows users to listen to the signal being recorded or streamed in real time without latency.
On the back of the microphone are two dials. The top dial allows mode selection. Users can turn the dial to choose one of four distinct pattern modes: Bidirectional mode records from both the front and the rear of the microphone and is ideal for recording a two-person interview. Stereo mode uses both the left and right channels to capture a broad, realistic sound mage. Omnidirectional mode picks up sound equally from all around the mic — ideal for capturing the ambience of “being there”; it’s the mode I’ll likely use when our school goes to a hybrid model and I’m moving around the room. Lastly, Cardioid mode records sound sources directly in front of the microphone and is great for podcasting and videoconferencing.
The second dial on the rear of the microphone is the gain control. This dial is used for adjusting the microphone’s sensitivity. For example, if the school bell rings or there is a loud announcement over the intercom, a quick adjustment of the gain dial keeps the signal from peaking and possibly hurting students’ ears on the other end.